
Hostel & Self-Contain DIY
DIY Water Storage Solutions for Hostels With No Water

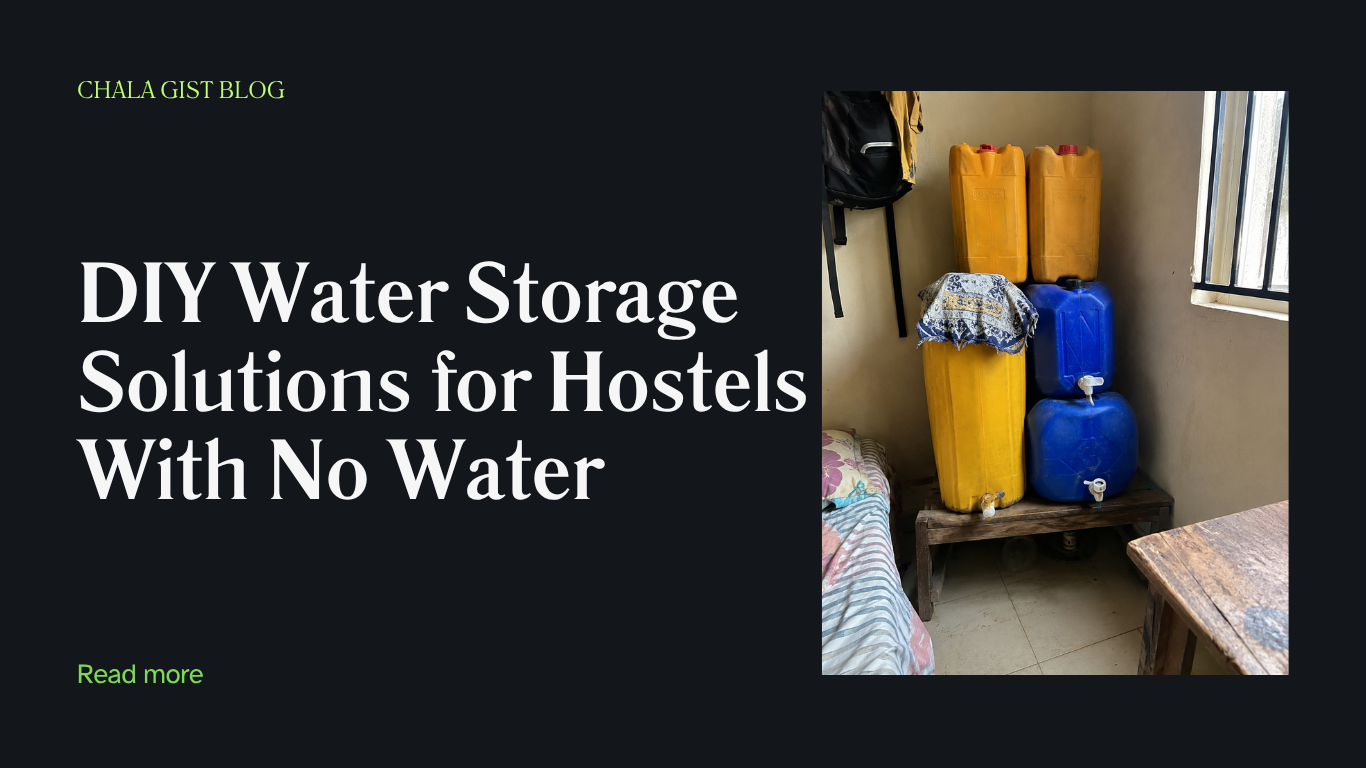
There’s a particular kind of tiredness that only students who have lived through hostel water wahala will understand. It’s not the tiredness from lectures or assignments. It’s the tiredness of standing under a cold tap at [4am / 5am] with your bucket, jerrycan, and sometimes even your reading table bowl, waiting your turn because “water don come” and everybody for the hostel just heard the news at the same time.
I remember the experience I had during my first year, second semester at Nkurumah Hostel in the University of Nigeria Nsukka (UNN). Nobody warned me that half of surviving hostel life in Nigeria has nothing to do with academics — it has to do with logistics. Water logistics, to be precise. I learnt the hard way, after loose guarded — maybe a day water didn’t come and you had to bathe with sachet water, or beg a neighbor, or trek to fetch from a borehole down the road.
That experience is what pushed me to build a proper water storage system in my room — not just one bucket here and one rubber there, but an actual system that means I’m never caught unprepared, no matter what NEPA or the school’s water corporation decides to do that week. In this guide, I’m sharing exactly what I use, what it costs, and the mistakes you should avoid, so you don’t have to learn everything the hard way like I did.
If you haven’t set up the rest of your room yet, you might want to start with our Complete Guide to Setting Up Your Hostel Room, which this post is a part of.
Why Water Storage Deserves Its Own Budget Line
A lot of freshers underestimate water. You budget for a reading table, a rug, curtains, extension box — but water storage gets treated as an afterthought, something you’ll “sort out later.” That’s a mistake, and here’s why.
Irregular water supply isn’t a small-inconvenience problem in Nigerian hostels — it affects almost everything else in your daily routine: bathing before an 8am class, washing plates before your roommate starts complaining, doing laundry before the weekend pile becomes a small mountain, and even something as basic as brushing your teeth. When water comes unexpectedly at odd hours (sometimes 2am, sometimes for just thirty minutes), the students who have proper storage are the only ones who actually benefit from it. Everybody else either misses the window or ends up in a stampede at the tap.
Setting up storage isn’t about hoarding water like it’s about to go extinct. It’s about smoothing out the unpredictability so your daily life doesn’t have to revolve around when the tap decides to cooperate.
Step 1: Know Exactly How Much Water You Actually Need
Before you rush to buy containers, sit down and think about your real usage. This is the step most people skip, and it’s why they either overspend on storage they don’t need, or underbuy and still run out mid-week.
As a rough guide for one student in a hostel room:
- Bathing (2x daily): roughly 10–15 litres per day
- Drinking and cooking (if you cook in-room): 3–5 litres per day
- Washing plates/utensils: 3–5 litres per day
- Flushing (if you have an attached toilet): varies widely, but budget 10–20 litres per day if you’re not on a shared/communal system
- Laundry: I usually do my laundry twice every week — budget for about 10-20 litres for each laundry.
Add these up and you’re typically looking at 20–35 litres of daily usage for a single student who isn’t doing much laundry that day, easily higher on wash days. If you want a buffer that can carry you through 3–4 days without a single drop from the tap, you’re realistically planning for 80–140 litres of stored water. That number should guide which combination of containers makes sense for you — not just “let me buy one big thing and hope.”
Step 2: Choose Your Storage Containers (Ranked by Budget)
You don’t need to buy everything on this list. Pick based on your room size, budget, and how bad your particular hostel’s water situation is.
1: Jerrycans (The Foundation of Every Hostel Water System)
Jerrycans are the backbone of hostel water storage, and for good reason — they’re cheap, stackable, easy to carry to and from the tap, and if one develops a problem, you haven’t lost your entire water supply at once (unlike a single big tank).
The standard 20–25 litre jerrycan is the sweet spot for most students. Go for the ones described as food-grade or UN-certified where you can find them — these are made to hold consumables safely, unlike some containers that were originally meant for chemicals or fuel and just get repurposed for water.
Cost: A single 20–25 litre jerrycan typically goes for around ₦2,500–₦5,000 depending on brand and where you buy (open market vs. supermarket vs. online). Buying 3–4 of these spreads your risk and gives you real flexibility.
Also, ensure you check each of the gallon jerrycans that you want to buy to avoid getting a fake one that would be very thin walled and can easily be broken or busted by any slit object, so check the jerrycan very well.
2: Storage Drums (For Bigger Reserves)
If your room has the floor space, a 100–250 litre plastic drum is a serious upgrade. These are the kind you’ll often see used in hostels, hotels, and even churches for bulk water storage. One drum can genuinely replace 5–6 jerrycans and free up a lot of clutter.
The tradeoff is space and mobility — once it’s full, you’re not moving it easily, so placement has to be right from day one (more on that below).
Cost: Expect to pay somewhere in the range of ₦15,000–₦30,000 for a mid-sized 100–250 litre drum, depending on brand and litre capacity. It’s a bigger one-time spend, but per-litre, it often works out cheaper than buying multiple smaller containers.
3: The “Improvised” Combo (Best for Tight Budgets)
If your pocket can’t carry a drum this semester, don’t panic — you can build a surprisingly solid system from things you already have or can get cheaply:
- Repurposed vegetable oil kegs (thoroughly washed and disinfected before first use)
- Large basins with tight-fitting lids
- Your bathing bucket, doubled as both a fetching tool and short-term storage
- Sachet/pure water cartons kept as emergency backup for drinking specifically
This combo won’t give you the same volume as a drum, but it’s a genuinely workable starting point, and you can upgrade piece by piece as your budget allows.
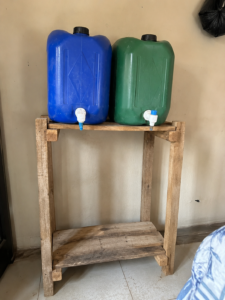
Homemade wooden stand for hostel water storage jerrycans
Step 3: Build a Simple DIY Storage Stand
One mistake I made early on was keeping my jerrycans directly on the bare floor. It looks fine until you realize two things: the floor under and around them stays permanently damp (hello, mold and that musty hostel smell), and it’s harder to tilt/pour from ground level without spilling half of it on yourself.
A basic raised stand solves this. You don’t need anything fancy — this can be built cheaply with the same materials used in our DIY Reading Table for Under ₦10,000 guide.
What you’ll need:
- Wooden planks or sturdy plastic crates (2–3, depending on how many containers you’re stacking)
- Nails or strong adhesive if using wood
- A waterproof mat or old tarpaulin to place underneath, just in case of small leaks or drips
Simple build steps:
- Lay your base crates/planks flat against a wall, ideally a corner, to save floor space.
- If stacking two levels, make sure the bottom level can comfortably bear the weight of full containers on top — water is heavier than people expect (1 litre = 1kg, so a 25-litre jerrycan full of water weighs 25kg).
- Leave gaps for air to circulate underneath rather than sealing it flat against the floor.
- Place your lighter, most-frequently-used containers on top, heavier reserve containers at the base.
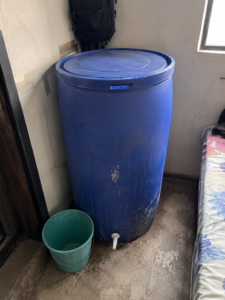
Covered plastic water storage drum in a hostel room corner
Step 4: Keep Stored Water Clean and Safe to Use
This is the part most guides skip, and it’s honestly the most important. Stored water that sits for days in a warm hostel room isn’t automatically safe just because it came from a “good” source. Here’s how I manage it:
- Always use a lid. Every open container is an invitation for dust, insects, and mosquitoes (stagnant open water is a classic breeding ground). Even a simple improvised cover — a tight cloth tied down, or a fitted basin lid — is far better than nothing.
- Separate drinking water from bathing/washing water. Don’t drink from the same jerrycan you use to flush or wash clothes with. Keep at least one container strictly for drinking and cooking.
- Treat your drinking water if you’re unsure of the source. Water purification tablets/drops (often called “water guard” locally) are cheap, widely available in pharmacies, and easy to use — follow the dosage instructions on the pack based on your container size. Boiling is also effective if you have a means to do it safely in your room.
- Don’t let water sit indefinitely. Rotate your stock — use the oldest water first, and try not to let drinking water sit for more than a few days, especially in hot weather.
- Clean your containers regularly. Every few weeks, empty, rinse, and sun-dry your jerrycans and drums. A build-up of slime on the inside walls is a sign it’s overdue for a proper wash.
- Keep containers off direct sunlight where possible. Heat speeds up bacterial growth and can also degrade cheaper plastic over time.
Step 5: Time Your Fetching Around the Water Schedule
If your hostel or area has any predictability to its water supply at all — even something loose like “water dey come around [certain hours]” — build a routine around it instead of waiting to be caught off guard.
A tip that helped me a lot: keep your containers already positioned near the tap or your door before water is expected, rather than realizing water has come and then scrambling to find your jerrycan under your bed.
Common Mistakes to Avoid
- Buying only one big container. If it develops a crack or someone contaminates it, you lose everything at once. Spread your storage across a few containers.
- Ignoring container quality. Cheap, thin, “fake” jerrycans crack easily and can leach unwanted taste/smell into your water, especially under heat. Spend slightly more for food-grade ones where you can.
- Overloading a single shelf/stand. Remember, water is heavy. A wobbly stand with three full jerrycans on it is an accident waiting to happen.
- Forgetting ventilation. A room full of sealed containers in a poorly ventilated space can start to smell musty. Crack a window when you can.
- Not budgeting for replacement. Plastic containers don’t last forever, especially with daily use. Plan to replace worn-out ones rather than waiting till they fail on you.
Estimated Cost Breakdown
| Item | Estimated Cost (₦) | Notes |
|---|---|---|
| 25L Jerrycan (x3–4) | ₦7,500–₦20,000 | Core of most hostel setups |
| 100–250L Drum (optional) | ₦15,000–₦30,000 | Best if room space allows |
| DIY Stand Materials | ₦2,000–₦5,000 | Wood/crates + waterproof mat |
| Water Treatment Tablets/Drops | ₦500–₦1,500 | Restock monthly |
| Lids/Covers (improvised) | ₦0–₦1,000 | Can often be improvised for free |
| Total (Budget Setup) | ₦10,000–₦25,000 | Jerrycan-only combo |
| Total (Upgraded Setup) | ₦25,000–₦55,000 | Includes a drum |
Frequently Asked Questions
How long can I safely store water in a hostel room? For bathing and washing, a week or so is generally fine as long as the container is covered. For drinking, it’s safer to rotate every few days and to treat the water if you’re unsure of its original source.
Is it safe to store water in used vegetable oil kegs? Yes, but only after thoroughly washing with soap and hot water (if available), rinsing multiple times, and ideally sun-drying before first use. Avoid containers that previously held anything non-food related, like fuel or chemicals.
What’s the cheapest way to start if I have almost no budget? Start with whatever buckets and basins you already have, add covers to keep them clean, and gradually add one proper jerrycan at a time as your allowance comes in. A partial system is still far better than none.
Should I get a drum or just more jerrycans? If your room has floor space and you deal with water scarcity often, a drum saves money per litre long-term. If space is tight or you move rooms often, jerrycans are more flexible.
Final Thoughts
Water storage is one of those hostel skills nobody teaches you before you resume, but once you sort it out, it quietly removes one of the biggest daily stressors of hostel life.
If you’re still setting up the rest of your space, check out our related guides on Fixing a Leaking Tap Without Calling a Plumber and Dealing With NEPA Power Outages as a Nigerian Student — both are part of the same Hostel & Self-Contain DIY series to help you run a smoother, more self-sufficient hostel room.

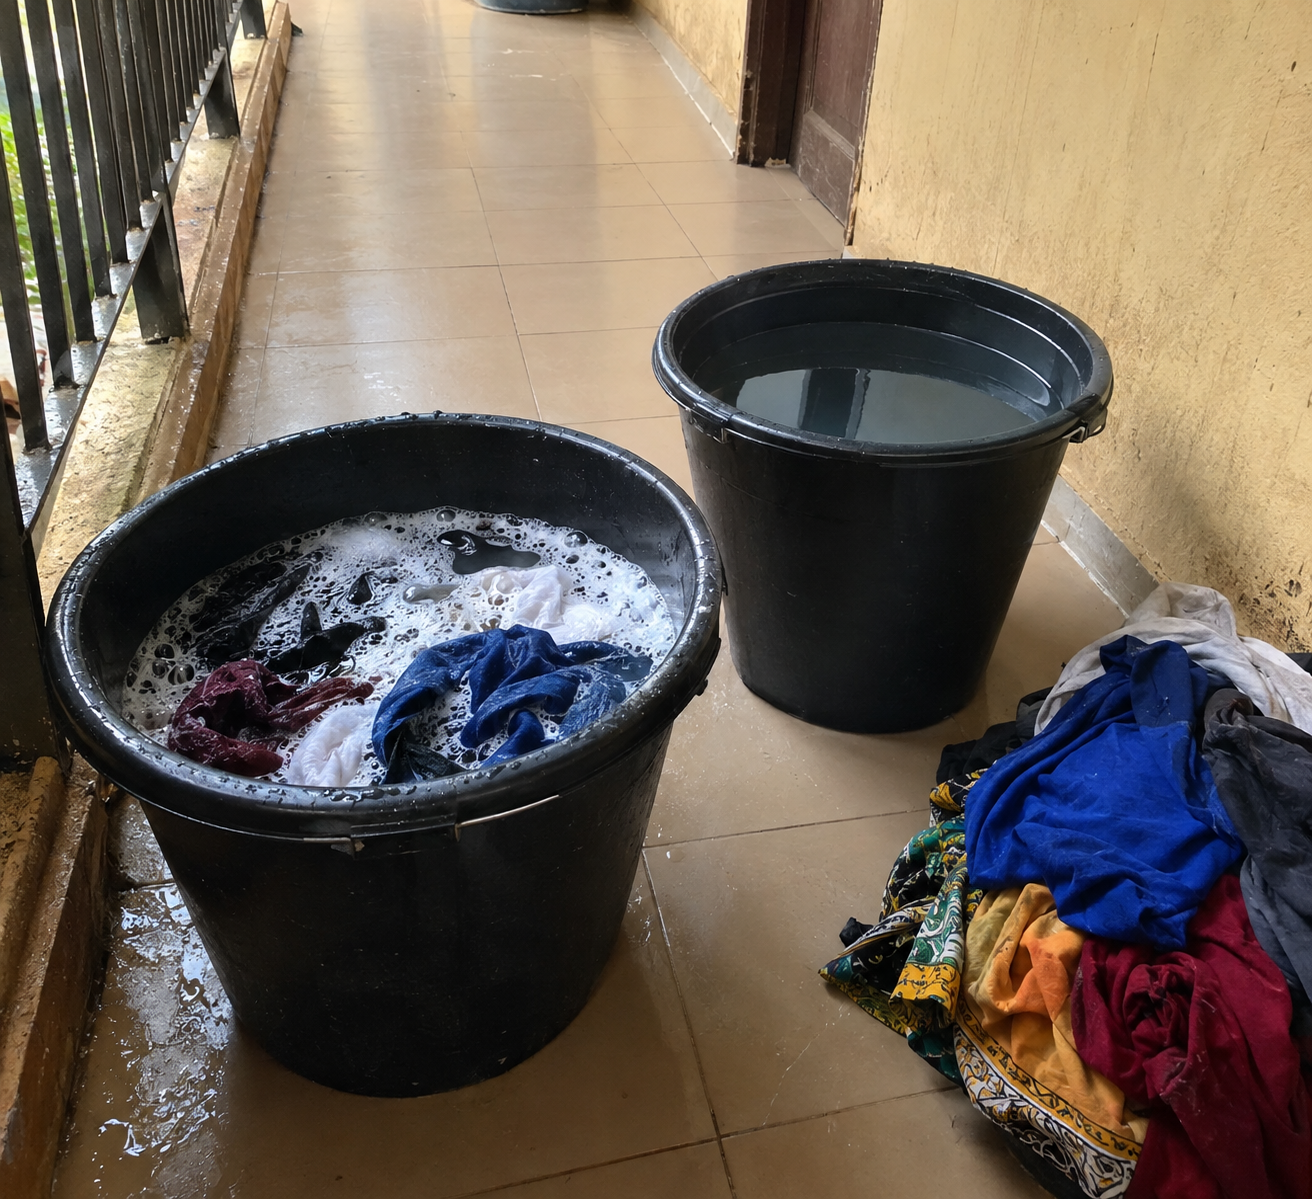
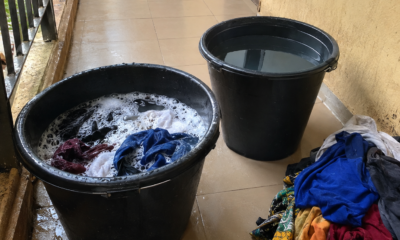
How to Do Laundry Efficiently Without a Washing Machine (What Actually Works in a Nigerian Hostel)
The first time I had to wash a full week of clothes by hand in my hostel, I told myself it would take thirty minutes, forty at most. Three hours later my back was aching, my palms were wrinkled like dried leaves, and my white shirt had somehow become a very sad shade of cream.
If you have ever stood over a bucket wondering where you went wrong, you are not alone. Most of us arrive at university with a washing machine at home in the background, or a mummy who did most of the work, and then suddenly we are on our own with a bucket, a sachet of detergent and a mountain of clothes.
Here is the good news. Washing clothes by hand is a skill, and skills can be learned. I have made most of the mistakes so you do not have to. This guide walks you through the exact system I use now: what to buy, how to wash, how to remove stains, how to dry clothes even when the weather is not cooperating, and whether those mini washing machines all over TikTok are worth your money.
Quick Takeaways
- Sort first, wash second. Sorting by colour and fabric prevents most laundry disasters.
- Use less detergent than you think. Too much soap means more rinsing, and residue is what makes clothes feel stiff and smell strange.
- Soak, do not just scrub. Soaking does the heavy lifting so your hands and back do not have to.
- Drying is half the job. Damp clothes left too long are what cause that “musty” smell, not the washing itself.
- Batch your laundry. A small, regular routine beats one exhausting Sunday marathon.
My Laundry Wake-Up Call
Let me tell you what went wrong that day.
I dumped everything into one bucket: white shirts, a red T-shirt, jeans, socks and my lab coat. I poured in what I thought was “enough” detergent (it was way too much), scrubbed like I was punishing the clothes, and wrung everything out until my wrists hurt. Then I hung the whole lot on the line and forgot about it.
By evening, my lab coat had a faint pink tint from the red T-shirt, my jeans were still damp at the waistband, and everything smelled slightly sour. Being a pharmacy student, walking into class with a pinkish lab coat was not my proudest moment.
That wahala taught me three things. First, never mix colours. Second, more soap does not mean more clean. Third, drying is not something you do casually. Once I fixed those three, laundry went from a three-hour ordeal to something I could finish in about an hour with far less stress.
Why Hand Washing Still Makes Sense
You might be wondering why anyone bothers learning this in 2026. Here is what I have learned.
It works. Brands that make washing machines themselves, like Maytag and Whirlpool, openly explain hand washing as a practical way to get clothes clean when you have no machine. And an item that is properly hand washed can be just as clean as one from a machine.
It is gentler on clothes. Hand washing preserves the fibres of your garments, so your favourite shirts last longer. That matters when you are buying thrift clothes (okrika) and trying to make them last.
It does not depend on NEPA. When light goes off for a day or two, hand washing does not care. Nothing to plug in, nothing to break.
It costs almost nothing. When I checked Jumia while researching this post, a small 80g detergent sachet was listed at around ₦215. Prices change often, so check before you buy, but the point stands: a few hundred naira of detergent can cover several small washes.
And it is not just students. Plenty of people in small apartments, dorms and rented rooms around the world are dealing with the same thing, which is why “laundry without a machine” content keeps popping up everywhere online.
What You Actually Need
You do not need a fancy setup. Here is my basic kit:
- Two buckets or basins. One for washing, one for rinsing. This alone saves you a lot of time. If you only have one, it still works. You will just refill it more often.
- Detergent. Look for the hand-wash version of the brand you like. Brands like Omo and Ariel sell both hand-wash and machine-wash powders. The hand-wash type is made to work when you agitate by hand.
- A bar of laundry soap or stain remover. For collars, underarms and stubborn spots.
- A soft brush. For jeans, sneakers’ soles and heavily soiled areas. Not for delicate clothes.
- Rubber gloves (optional). Some detergents and hot water are hard on the skin. Gloves protect your hands.
- A clothesline, pegs and hangers. Or a foldable drying rack. Airflow between clothes matters more than fancy equipment.
- A dry towel. The secret weapon for faster drying. I will explain shortly.
A quick safety note about bleach. If you use bleach (like Jik), use it only on whites, dilute it as the label says, and never mix it with other cleaning products. Test on a hidden area first if you are unsure.
The Step-by-Step Method
This is the method that finally worked for me. It follows the same general approach recommended by laundry brands and cleaning experts, with a few small changes to suit hostel life.
Step 1: Sort Your Clothes
Split your laundry into piles:
- Whites and very light colours
- Bright colours
- Dark colours and jeans
- Delicates and underwear (I wash these separately)
Check the care labels. If a label says “dry clean only”, do not wash it by hand. Also, empty your pockets. I have lost more than one ₦200 note to the wash.
Step 2: Pre-Treat Stains
Before anything touches water, look for stains on collars, cuffs, underarms and knees. Rub a little bar soap or stain remover directly on the stain and leave it for 10 to 15 minutes. If you are using a stain product for the first time, test it on a small hidden area to be safe.
Step 3: Soak
Fill your bucket about three-quarters full with cool or lukewarm water. Add a small amount of detergent and stir until it dissolves and you see a few suds.
How much detergent? Most guides recommend surprisingly little, about one to two teaspoons for a sink or basin. In a bigger bucket, I use roughly one to two level tablespoons of powder and only add more if I see no suds at all. If everything is foaming like a bubble bath, you have used too much.
Put your clothes in, push them under so they are fully submerged, and let them soak for 20 to 45 minutes. Do not soak much longer than that, especially with coloured clothes. Start with whites and lighter items, and use the same water for darker ones later if you have to.
Step 4: Wash
After soaking, swish the clothes around with your hands for a couple of minutes. Then gently rub the fabric against itself, especially in the dirty areas. Sturdy fabrics like cotton and denim can handle a firmer rub. Delicate fabrics should just be pressed and squeezed, not scrubbed.
Work in this order: collars, underarms, cuffs, then the rest. It takes about two to five minutes per item.
Step 5: Rinse
Drain the soapy water and fill the second bucket with clean water. Swish the clothes for about two minutes, squeeze out the suds, and repeat until the water runs clear. This usually takes two rinses, sometimes three for thick clothes and towels.
Do not skip this. Leftover soap is why clothes come out stiff, scratchy or “off” smelling.
Step 6: Squeeze Out the Water
Press the water out of each item. Avoid twisting delicate clothes because it can stretch and damage them. For heavier items, you can fold them and press hard, or gently twist sturdy fabrics like jeans.
Step 7: Dry Right
Shake each item out, hang it up properly and give it space. I will cover drying in detail below because it is where most people go wrong.
How I Make Laundry Faster and Less Tiring
Once you know the basics, efficiency comes from the system, not from working harder.
Wash small and often. A small load twice a week is less tiring than one giant load on Sunday. Your back will thank you.
Use the two-bucket method. One bucket for washing, one for rinsing. You are never waiting for water to drain and refill.
Soak while you do something else. Once the clothes are soaking, I reply messages, read notes or cook. The soak does the cleaning while I do something useful.
Reuse your rinse water. The final rinse water is usually only lightly soapy, so I use it to mop my floor or flush the toilet, which is handy when water is scarce in the hostel. (Just never use it on food-related tasks.)
Keep your water ready. When water only comes at certain times, fill a few buckets early. Check out my guide on [hostel water storage] for tips.
Wash underwear and socks more often. They pile up fast, and they are the easiest to handle in small quantities.
Do not overload the bucket. If the clothes cannot move freely, the detergent cannot circulate. Two smaller batches beat one crammed bucket.
How to Handle Different Fabrics
Not all clothes want the same treatment.
T-shirts and everyday cotton. These are the easy ones. Soak, rub the collar and underarms, rinse, hang.
Jeans. Wash inside out, less often than you think, and use cool water to protect the colour. A soft brush helps on dirty knees and hems. Jeans are bulky, so they take a long time to dry. Give them a sunny, breezy spot.
White shirts and lab coats. Wash whites separately. Never mix them with colours, as I learned the hard way. Sunlight is your friend here, because it naturally helps lighten whites. Treat collars and cuffs early before stains set.
Underwear and socks. Wash them separately from the rest and dry them in full sun if you can. The sun’s UV rays are good at killing the bacteria that cause odour on these items.
Sportswear. Rinse out sweat quickly. Do not leave sweaty clothes sitting in a bag for days.
Delicates and knits. Press and squeeze gently, do not twist, and lay sweaters and stretchy knits flat to dry so they do not lose their shape.
Bedsheets and towels. These are the heavy ones. Wash them in smaller batches, rinse them extra well, and hang them first on the line, since they take longest to dry.
Stain Removal That Works
Stains are not the end of the world if you act quickly.
- Sweat and underarm marks. Apply bar soap and let it sit for 10 to 15 minutes before soaking.
- Food and oil stains (jollof, stew, palm oil). Scrape off the excess first, then apply soap directly and rub gently from the outside of the stain inward so it does not spread. Wash while the stain is fresh if possible.
- Mud and dirt. Let the mud dry, brush off the loose dirt, then soak and wash.
- Ink. Test any stain remover on a hidden spot first, and treat ink as early as you can.
- Old, stubborn stains. Repeat the soak and gentle scrub. Patience beats force.
The golden rule: never put a stained item in the sun before the stain is gone. Heat and light can set some stains permanently.
How to Dry Clothes Properly (Even in Rainy Season)
This is the part nobody tells you, and it is why clothes sometimes come out “washed” but still smell bad.
Aim to have clothes dry within a few hours. Cleaning experts suggest drying within about two to six hours where possible, and a musty smell is a sign that bacteria, mould or mildew have started to form. On a warm day with a light breeze, most fabrics take around two to four hours to dry outdoors.
Never fold or put away damp clothes. This is how mildew starts. Make sure everything is fully dry before it goes back in your box or wardrobe.
Give clothes space. Leave a bit of gap between items so air can move. Overlapping clothes dry slowly.
Wind beats heat. Moving air is more effective than hot sun for drying. A windy, cloudy day can dry clothes faster than a hot, still one.
Whites in the sun, colours in the shade. Direct sunlight fades dark and bright clothes, while it helps brighten whites. Turn coloured clothes inside out and hang them in a shaded, breezy spot.
Do not leave clothes out overnight. Night dew can dampen almost-dry clothes again. Bring them in before evening.
Rainy season and harmattan tricks.
- Squeeze out as much water as you can, then roll the clothes in a dry towel and press. It pulls out a surprising amount of water.
- Hang clothes near a window with airflow, or use a fan when there is light.
- Hang heavy items first and light ones after.
- In harmattan, clothes dry fast, but the dust is real. Shake clothes out before you bring them in.
The Portable Washer Trend: Worth It or Hype?
Something I have noticed lately: portable mini washing machines are all over TikTok. Search “portable washing machine” and you will find creators pushing compact twin-tub washers, and even small units that attach to a bucket, as back-to-school and dorm essentials. They are marketed for dorms, apartments, camping and small loads like underwear, baby clothes and cleaning cloths.
Even laundry brands and blogs are saying that compact portable washers are a big reason laundry content is trending right now.
So are they worth it for a Nigerian student? Here is my honest take.
When it can make sense:
- You have stable power (or a small generator or inverter) and a socket in your room or nearby.
- You have somewhere to drain the water.
- You mostly wash small loads.
- You can afford it without touching your feeding money.
When I would skip it:
- Light is unreliable, which makes hand washing the more dependable option.
- Your hostel restricts appliances. Always check the rules first.
- Your budget is tight. Older Nigerian price guides put compact washers somewhere between ₦30,000 and ₦100,000, and prices have almost certainly moved since then, so check current prices on Jumia before deciding.
- You are buying purely because a TikTok video made it look effortless.
For me, a good hand-washing system costs a fraction of that and works every day, light or no light. If you want a cheaper “in-between” option, some people use a hand-operated plunger-style washer with a bucket, which works like a toilet plunger over your clothes after soaking. But even that is optional.
The real lesson from the trend: what people are chasing is convenience, not machines. A smart routine gets you most of that convenience for free.
Mistakes to Avoid
- Using too much detergent. It does not clean better, and it demands extra rinsing.
- Mixing colours. Especially reds, blues and blacks with whites.
- Scrubbing everything hard. Rough handling ruins fabric and colour.
- Twisting delicate clothes. It stretches and damages them.
- Soaking coloured clothes for hours. Colour can bleed.
- Skipping the rinse. Soap residue causes stiffness and odour.
- Hanging clothes bunched up. They dry slowly and smell.
- Bringing in clothes late or storing them damp. Mildew loves that.
- Mixing bleach with other products. Dangerous and not worth the risk.
- Washing everything at once. Small batches are easier and cleaner.
A Weekly Routine You Can Copy
Here is the routine that fits around lectures and practicals:
| Day | What I wash |
|---|---|
| Monday evening | Underwear, socks, sportswear |
| Wednesday | Everyday T-shirts and light clothes |
| Saturday morning | Jeans, dark clothes, one heavy item (sheets or towels) |
| As needed | Lab coat or white uniforms, treated early |
Adjust it to your schedule. The point is not perfection. It is avoiding the dreaded “everything is dirty and I have an exam” panic.
Frequently Asked Questions
Can hand washing get clothes as clean as a washing machine?
Yes, if you do it properly. Pre-treat stains, soak, focus on dirty areas and rinse thoroughly. Hand-washed clothes can be just as clean as machine-washed ones, and it is often gentler on the fabric.
How long does it take to wash clothes by hand?
For a small load, expect about 20 to 60 minutes in total, but most of that is soaking. The actual work is often around 15 to 20 minutes.
Should I use hot or cold water?
Cool or lukewarm water is the safest for most everyday clothes. Very hot water can damage some fabrics and is hard on your hands.
What if I run out of detergent?
Bar laundry soap works in a pinch. Rub it on the wet fabric, work up a lather and rinse well. It is also good for spot-treating stains.
How often should I wash my clothes?
Underwear and socks after every wear. Sportswear after every use. T-shirts after one or two wears, depending on sweat. Jeans can go longer between washes.
How do I stop my clothes from smelling musty?
Rinse thoroughly, dry them quickly (within a few hours if you can), give them airflow and never store them damp.
Is a portable washing machine worth it?
It depends on your power situation, space and budget. If light is unreliable, hand washing is the better fit. If you have steady power and want convenience for small loads, a compact washer can work. Check your hostel’s rules and the current price before buying.
Final Thoughts
Learning how to do laundry without a washing machine is one of those small life skills that quietly makes university easier. It saves money, it works when there is no light, and once you have a system, it stops feeling like punishment.
Start with the basics: sort, soak, wash gently, rinse well and dry properly. Add the small habits (washing little and often, reusing rinse water, drying with airflow) and you will be surprised how quickly it becomes routine.
I am still learning too, and I would love to hear from you. What is the biggest laundry wahala you have faced in your hostel, and what trick saved you? Drop it in the comments. Someone reading this might need exactly that tip.
Sources referenced while researching this post
- Maytag, “How to Do Laundry Without a Washing Machine”: https://www.maytag.com/blog/washers-and-dryers/how-to-do-laundry-without-washing-machine.html
- Whirlpool, “How to Wash Clothes Without a Washer”: https://www.whirlpool.com/blog/washers-and-dryers/how-to-wash-clothes-without-washer.html
- Dropps, “How to Hand Wash Clothes”: https://www.dropps.com/blogs/spincycle/how-to-properly-hand-wash-clothes
- Simple Green, “How To Hand Wash Clothes”: https://simplegreen.com/cleaning-tips/laundry/laundry-hand-wash/
- Homes & Gardens, on drying clothes outdoors: https://www.homesandgardens.com/household/laundry/concerns-when-drying-clothes-outside
- Bob Vila, “How to Air Dry Clothes and Linens”: https://www.bobvila.com/articles/how-to-air-dry-clothes/
- Speed Queen, “Drying Laundry Outdoors”: https://laveries-speed-queen.fr/en/blog/dry-laundry-clothesline-outdoor/
- Mozi Wash, “How to Do Laundry Without a Washer”: https://www.moziwash.com/blogs/mozi-wash/how-to-do-laundry-without-a-washer-8-ways
- Business AM, “Which powder detergent is best?”: https://businessamlive.com/which-powder-detergent-is-best/
- Jumia Nigeria, powder detergent listings: https://www.jumia.com.ng/powders-detergent/
- NaijaTechGuide, compact washing machine prices (older data): https://www.naijatechguide.com/compact-portable-washing-machines-in.html
MORE TO CHECK OUT:
- How to Organize a Nigerian Hostel Room on a Small Budget
- DIY Reading Table for Under ₦10k: How I Built Mine in a Weekend
- How I Fixed My Leaking Tap in My Hostel Room Without Calling a Plumber
- How to Decorate a Small Hostel or Lodge Room Without Spending Much As a Student
- How to Make Your Room Smell Good and Stay Clean With Limited Space
- How to Deal With NEPA (Power) Outages as a Student
-
DIY Mosquito-Proofing Your Room: How I Stopped Fighting Mosquitoes Every Night in My Hostel
-
How to Soundproof a Thin Hostel Wall Cheaply (Without Wahala or Wasting Money)
-
How to Budget Your Semester Allowance as a Nigerian Student (To Avoid Borrowing From Loan Apps)
-
10 Cheap Foodstuff Combos That Actually Fill You Up on Campus (2026 Guide)
-
How to Cook Without a Kitchen: Hostel-Friendly Meals With One Burner
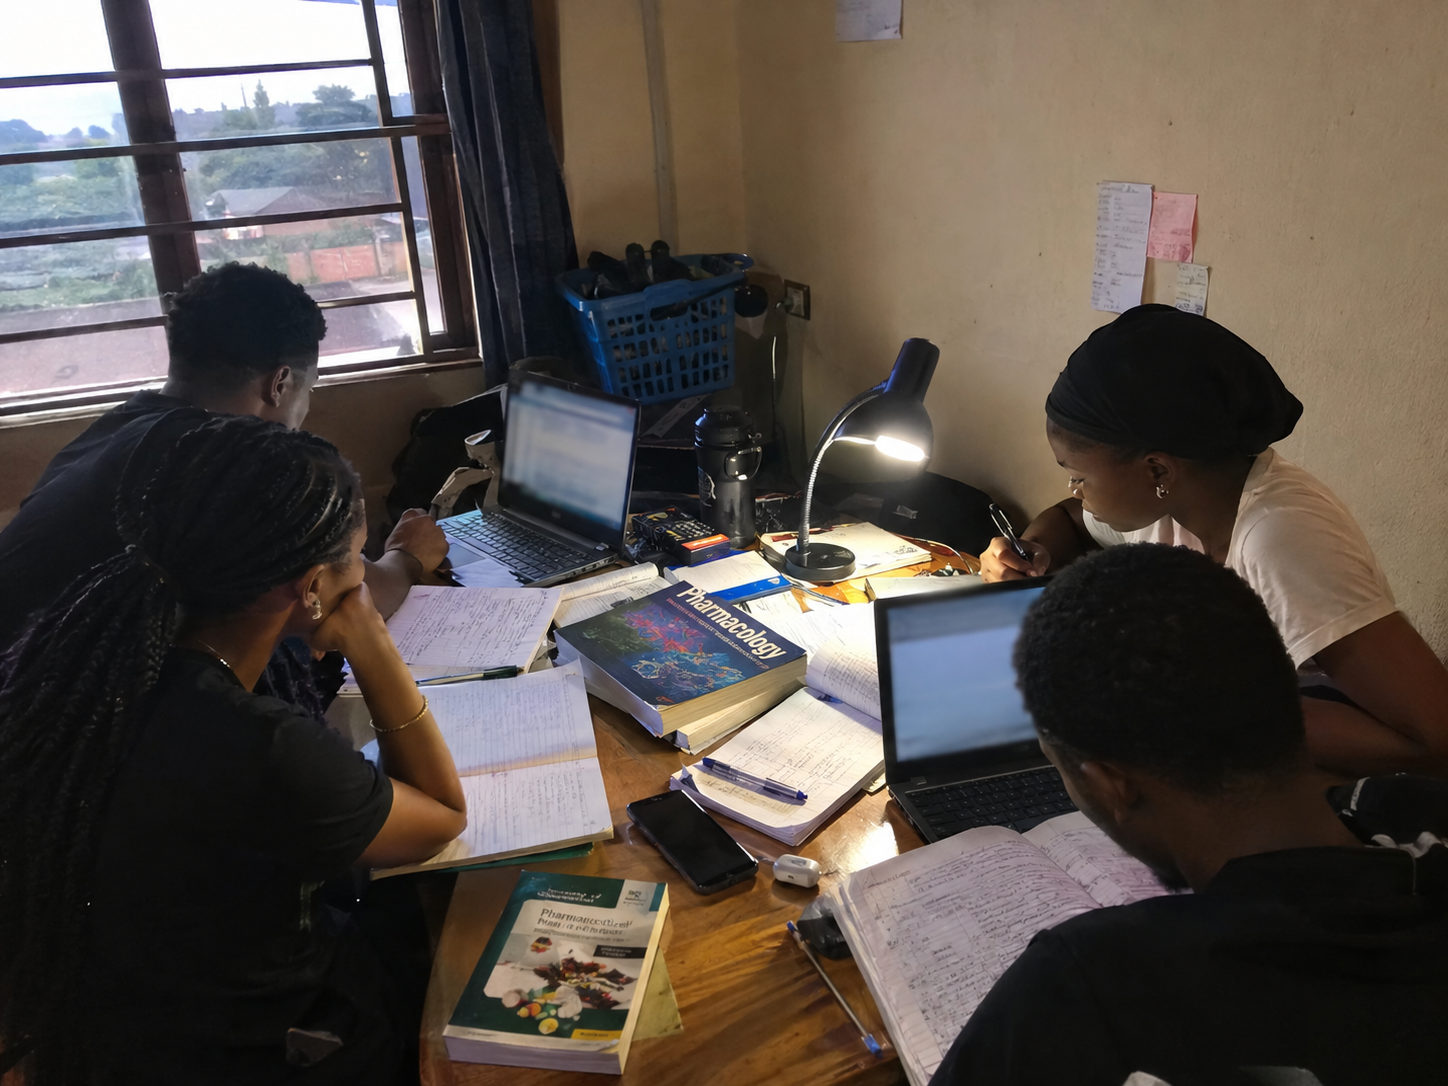
DIY Group Study Setup: How We Turned a Tiny Common Room and a Balcony into a Proper Study Space
Last semester, my study group almost died, and it had nothing to do with laziness. We simply had nowhere to sit.
There were four of us, all Pharmacy coursemates preparing for the same tough set of exams. The library was full by 8 a.m. My room could barely hold two people and a bucket. Every time we tried to study in the corridor, somebody’s speaker, somebody’s cooking or somebody’s long phone call swallowed the whole evening.
Then one Saturday, we looked at the small common room in our flat and at the balcony we only used for drying clothes, and one of us said, “Why are we not studying here?”
Three weekends and a small shared budget later, those two spaces became the place where most of our group studying happens. This post is the full story: the layout, the lighting, the balcony wahala, the rules, the money and the mistakes we made so that you can skip them.
If you live in a hostel, a self-contain or a shared flat and you want to study with friends without fighting for space, you can copy most of this in one weekend.
In this guide, you will learn:
- Why a group study setup matters more for Nigerian students right now
- The “body doubling” trend and why it works even without an app
- How to plan a small common room layout that seats four people
- How to fix light and power so NEPA does not end your session
- How to turn a balcony into a workable study zone (and how to keep it safe)
- A realistic naira budget, plus how to run a session that actually works
Why I Stopped Relying on the Library for Group Study
I want to be fair to the library. I still use it for silent, solo work, and nothing beats it for that. But a library is built for silence, and group study needs talking: explaining, arguing, correcting each other. That is exactly where the good learning happens, and exactly what the library does not allow.
There is also a bigger picture behind our small problem. According to a report in The Guardian Nigeria, fewer than 12,000 students can be accommodated on campus at UNN out of an estimated 45,000 enrolled. A June 2026 report by Fortren & Company, covered by PM News, put Nigeria’s student hostel shortage at more than one million beds, with under 9% of students having access to formal accommodation.
What does that mean in real life? More of us are squeezed into shared flats, off-campus rooms and crowded hostels, and the space we study in has to do more than one job. A common room is a TV room, a kitchen extension and a meeting point all at once. So if you want to study there, you have to design for it on purpose.
The Trend Behind This: Body Doubling and “Study With Me” Go Offline
While we were figuring this out, I kept seeing the same idea online. It is called body doubling.
The concept is simple. Body doubling means working on your own task while another person quietly works nearby, either in the same room or on a shared video call. You are not collaborating, but the presence of someone else focused makes it easier to stay focused yourself. The idea started in the ADHD community as a way to get past the “I cannot start” feeling, and it has since spread to students and remote workers in general.
It is properly mainstream now. Universities are running it as an event: the student affairs office at Texas Law, for example, is hosting structured body-doubling sessions with set study times, wellness breaks and snacks this very month. Online, apps such as Focusmate and StudyStream let you sit in a live room with strangers. One 2026 roundup says StudyStream alone has a community of over 270,000 students. And “Study With Me” videos, where someone simply studies on camera for an hour, have become a whole genre on YouTube.
Here is my honest take, though. Body doubling is not magic, and much of the evidence so far is informal or still developing, so I would not promise anyone it will fix their focus. But it matched what my group already felt: on days when we studied in the same room, even in silence, we got more done than on days each person struggled alone.
And here is the Nigerian twist. Online study rooms need data and steady power, and neither of those is guaranteed. The offline version costs nothing. You just need a decent place to sit together. That is really all our common room is: a body-doubling room with snacks. If you cannot be together in person, keep the online version as a backup (I will come back to that near the end).
Step 1: Decide What the Space Is For
Before we moved a single chair, we had a short conversation, and I now think it was the most important thing we did. We agreed that the space has two modes:
- Quiet mode: everyone works on their own material in silence. This is our body-doubling time.
- Talk mode: we explain topics to each other, quiz each other and argue about answers.
We gave each mode fixed hours. Talk mode was for the afternoon and early evening, when neighbours are also awake and moving around. Quiet mode took over later in the evening. Without this rule, the room drifts into a half-talking, half-studying mess where nobody gets proper focus and nobody gets proper discussion.
Write the two modes on a piece of paper and stick it on the wall. It sounds childish, and it works.
Step 2: Plan the Common Room Layout
Our common room is about three metres by three and a half. It had a small TV stand, a wobbly centre table and one long chair that everybody fought for. If your space is similar, these are the changes that made the biggest difference:
Push the table against a wall. A table in the middle of a small room eats all your walking space. Against the wall, it becomes a workbench, and people can sit on three sides.
Seat people in a horseshoe, not a circle. Everybody faces the table and the wall, so nobody stares at the TV or the door. Fewer distractions, easier to share a whiteboard.
Mix chairs and stools. Stools tuck under the table when you are not using them, which gives the room back to the flat when you are done. Four people is the comfortable number for a room this size. Five is the maximum before it turns into a party.
Keep one clear walkway. Somebody will need to pass to the kitchen or the toilet. If your layout blocks that, your flatmates will start hating your study group, and then the whole space is in danger.
Do the stand-up test. Once you have arranged everything, stand up and walk through the room as if you were going to the kitchen. If you have to squeeze past someone, adjust the layout again.
Sort your cables. We used one extension board and ran the cable along the wall with masking tape. Masking tape is your friend in a rented space because it does not damage paint. Put a piece of tape on each charger with the owner’s name so nothing goes missing at 11 p.m.
If your hostel room is the main place you study, you might also like my guide on building a DIY reading table and the post on creating a distraction-free study corner. The common room uses the same ideas, just at a group scale.
Step 3: Fix the Light and Power (Because NEPA Will Test You)
Anyone who has studied in Nigeria knows the feeling: you are halfway through a hard topic and the light goes. A group study setup that dies when NEPA takes light is not a real setup.
We solved it with three things.
1. A rechargeable desk lamp. When I checked Jumia Nigeria in September 2026, a rechargeable LED desk lamp with a phone holder and touch control was listed at ₦6,883 (down from ₦10,454), and a Taigexin rechargeable reading lamp was around ₦8,819. If you want something that doubles as an emergency light, a 3-in-1 lamp with a flashlight and hook was around ₦11,499. Prices move, so check the live listing before you buy.
One lamp is enough for a table of four if it has adjustable brightness, but two make a big difference to how much your eyes hurt after two hours. Place the lamp on the side opposite your writing hand so your hand does not throw a shadow on the page.
2. A simple charging routine. During light hours, we charge lamps, phones and power banks first, before anything else. We even agreed on a “charging corner” on the extension board so that nobody unplugs the lamp for a phone.
3. A no-screen fallback plan. When the light goes and the batteries are low, we switch to a teach-back round. That is when each person explains a topic out loud, using only a notebook and the lamp. It uses almost no power and, honestly, it is often our best round of the day.
If power cuts are your biggest headache, I wrote a full guide on studying through NEPA outages that goes deeper.
Step 4: Turn the Balcony into a Study Zone
The balcony was the part I doubted most. It was narrow, it faced the afternoon sun and it smelled faintly of detergent. But it turned out to be our favourite part of the whole setup, because it gave us something the common room could not: fresh air and a change of scenery.
Our balcony is only about a metre and a bit wide, so we treated it as a two-person “focus zone” rather than a full study room. Here is what we did.
Safety first. This is the part most blog posts skip, so let me say it plainly. Before you study on a balcony, check that the railing is solid and the floor is stable. Nobody should sit on or lean on the railing. Keep laptops and phones away from the edge. Do not crowd the space, and never treat it as an extra seat for a party. If the balcony feels shaky in any way, leave it alone and use the common room instead.
Table and seating. A foldable laptop table and two stools were enough. On Jumia, foldable laptop tables and stands were listing from roughly ₦3,900 to ₦4,400 when I looked. The advantage of foldable furniture is that you can pack it away in two minutes when it rains or when your landlord visits.
Shade. Afternoon sun on the balcony is brutal, and glare on a screen makes studying painful. A curtain or a simple cloth shade on the side facing the sun fixed most of it. Plan your balcony hours around the sun: for us, the early morning and the late afternoon worked best.
Rain and harmattan dust. In the rainy season, the balcony is a no-go for electronics unless it is properly covered. During harmattan, dust settles on everything, so we wipe the table before each session and keep laptops in a bag until we are ready.
Mosquitoes. Evening study on a balcony means mosquitoes. Use a repellent that is safe for you, and if you have a mosquito-proofing routine for your room, follow it here too. Our full guide on mosquito-proofing your hostel room covers the options.
Theft. Do not leave phones or laptops on a balcony table when you step away, especially if it is visible from outside.
What surprised me most is how different the balcony felt for silent work. Ten minutes outside, and my head was clearer than it had been after an hour in the crowded common room.
Step 5: Manage Noise and Neighbours

Photo credit: Premiumtimes
A study group that annoys the neighbours will be shut down eventually, so build the noise plan into your setup.
We do three simple things:
- Set talk-mode hours and tell flatmates and neighbours what they are. If people know when to expect discussion, they complain less.
- Use soft items. A mat or rug on the floor, a curtain on the window and even a few cushions absorb echo, and a small room echoes badly with four people talking.
- Keep the door and balcony conversation low. Sound carries in thin-walled buildings. If your walls are like mine, my post on soundproofing thin hostel walls has cheap fixes.
Respect goes a long way here. We once made egg sandwiches for the flatmate who had been patient with our noise. It cost almost nothing and bought us a lot of goodwill.
Step 6: Build a Shared Knowledge Wall
This was the cheapest upgrade with the biggest effect. We stuck a small whiteboard on the wall with masking tape, and next to it, a few sheets of paper for “topics covered” and “questions we could not answer.”
It gave the group a shared brain. Instead of every person keeping private notes, we could see what had been covered and what was still weak. When one of us got stuck on a topic, we wrote it on the wall and it became the next teach-back round.
If you cannot afford a whiteboard, use a large sheet of white cardboard or stick sheets of paper together. What matters is that the wall is visible from every seat.
What It Cost: A Realistic Naira Budget
Here is the rough budget for our setup. The lamp and laptop table figures come from Jumia listings I checked in September 2026. The rest are market-price estimates from my area, so treat them as a guide, not a promise.
| Item | Rough cost (₦) |
|---|---|
| Rechargeable desk lamp | 6,900 to 8,800 |
| Foldable laptop table or stand (balcony) | 3,900 to 4,400 |
| Extension board with surge protection | 5,000 to 8,000 |
| Two stools or plastic chairs | 6,000 to 10,000 |
| Whiteboard or marker board | 3,000 to 8,000 |
| Mat or rug | 3,000 to 6,000 |
| Masking tape, markers, paper | About 1,500 |
| Estimated total | About 29,000 to 47,000 |
Split four ways, that is roughly ₦7,000 to ₦12,000 each, less than one month of decent data for some people, and it lasts the whole semester and beyond. If money is tight, start with the lamp, the extension board and masking tape. You can add the rest week by week. For more ways to stretch your money, see my post on managing your semester allowance.
How We Actually Run a Session
A nice space is useless without a routine. This is the schedule we settled on after some trial and error:
- Goals (5 to 10 minutes). Each person says what they will finish in this session. Write it on the wall.
- Focus round 1 (25 minutes). Silent, phones in a basket. This is the body-doubling block.
- Short break (5 minutes). Stretch, water, a quick chat.
- Focus round 2 (25 minutes). Silent again.
- Teach-back round (30 minutes). One by one, each person explains a topic without looking at notes, and the others ask questions.
- Wrap-up (5 minutes). Write what is still unclear on the wall for next time.
The 25-and-5 rhythm is the classic Pomodoro method, and it is popular for a reason. The teach-back round is where the real learning gains come from. Research on retrieval practice, which means pulling information out of your memory instead of just re-reading it, shows that it tends to outperform more common approaches like repeated studying. Explaining a topic to friends forces exactly that kind of recall, and having them question you shows you the gaps quickly.
There is also some evidence that the two styles work well together. One summary of research on group work found that students who did more than one group session before practising alone could remember more material in the long run. In plain terms: use the group to sharpen your understanding, then test yourself alone afterwards. We now do a quick solo “brain dump” the next morning on whatever we discussed the night before.
Mistakes We Made (So You Do Not Have To)
<!– SWAP: replace with your real mistakes –>
- We bought a lamp that was too bright. It gave us headaches within an hour. Choose one with adjustable brightness.
- We ignored the afternoon sun. Our first balcony session was miserable because of glare. Now we plan around it.
- We had no fixed schedule at first. The common room slowly turned back into a TV room. A written timetable fixed that.
- We allowed food everywhere. Crumbs, oil and a spilled drink on a laptop keyboard taught us that food belongs at the break, away from the table.
- We let the group grow to seven. It felt friendly, but nobody could focus. We went back to four or five.
- We did not clean up after each session. Two days of mess and the flatmates were angry. Now the last ten minutes of every session is tidy-up time.
The Group Rules That Kept Us Together
Study groups often fail because of people, not space. These are the rules we agreed on, and we wrote them down:
- Phones go in a basket during focus rounds.
- Everyone arrives on time, and we start with or without you.
- Come with a goal, not just your body.
- No gossip during focus or teach-back rounds.
- Everyone teaches at least once per session.
- Tidy up before you leave.
- Anyone can call “time” if the group drifts.
It may feel too strict for friends. But these rules are what let us stay friends while actually passing our exams.
When You Cannot Meet: A Simple Hybrid Backup
Some days, a person is sick, stuck at home or travelling. For those days, we keep a video call open with cameras on and mics muted, so that person can still do their focus rounds with us. It is body doubling on a small scale. Just remember data and power: a short 50-minute session is enough, and it helps to charge everything beforehand. My post on free apps for Nigerian students lists tools that do not need much data.
Frequently Asked Questions
How many people can study in a small common room?
For a room of about three by three and a half metres, four people is comfortable and five is the maximum. Beyond that, noise and movement start to hurt everyone’s focus.
Is it safe to study on a balcony?
It can be, but only if the railing and floor are solid. Never sit or lean on the railing, keep electronics away from the edge and rain, and do not leave valuables unattended. If anything feels unstable, use another space.
How do I stop a study group from turning into gossip?
Use timed focus rounds, a phone basket, a written goal for each person and a fixed end time. Structure protects the group’s time, and nobody feels attacked because the rules apply to everyone.
What if NEPA takes light during the session?
Keep a rechargeable lamp and power banks charged, and switch to a teach-back round that needs little or no screen time. You lose almost nothing and the session continues.
Do I need permission to change a shared or rented common room?
If the space belongs to your landlord or is shared with flatmates, talk to them first. Use non-permanent fixes such as masking tape, freestanding boards and foldable furniture so nothing needs to be repaired later.
Final Thoughts
Studying in a group is one of the most useful habits I built as a student, but the habit only stuck when we gave it a proper place. That place did not need to be big or expensive. A small common room, a narrow balcony, one good lamp and a set of agreed rules were enough.
If you take only three things from this post, let them be these. First, split the space into quiet mode and talk mode. Second, solve light and power before you buy anything else. Third, keep the group small and the rules written down.
Start this weekend. Move the table, tape the cable to the wall, and invite two coursemates for one 25-minute round. You may be surprised how much a small space can hold.
If you try this setup, or you have a better idea for a small common room or balcony, drop a comment and tell me about it. I read every one. For more practical tips for hostel life, check out my complete guide to setting up your hostel room.
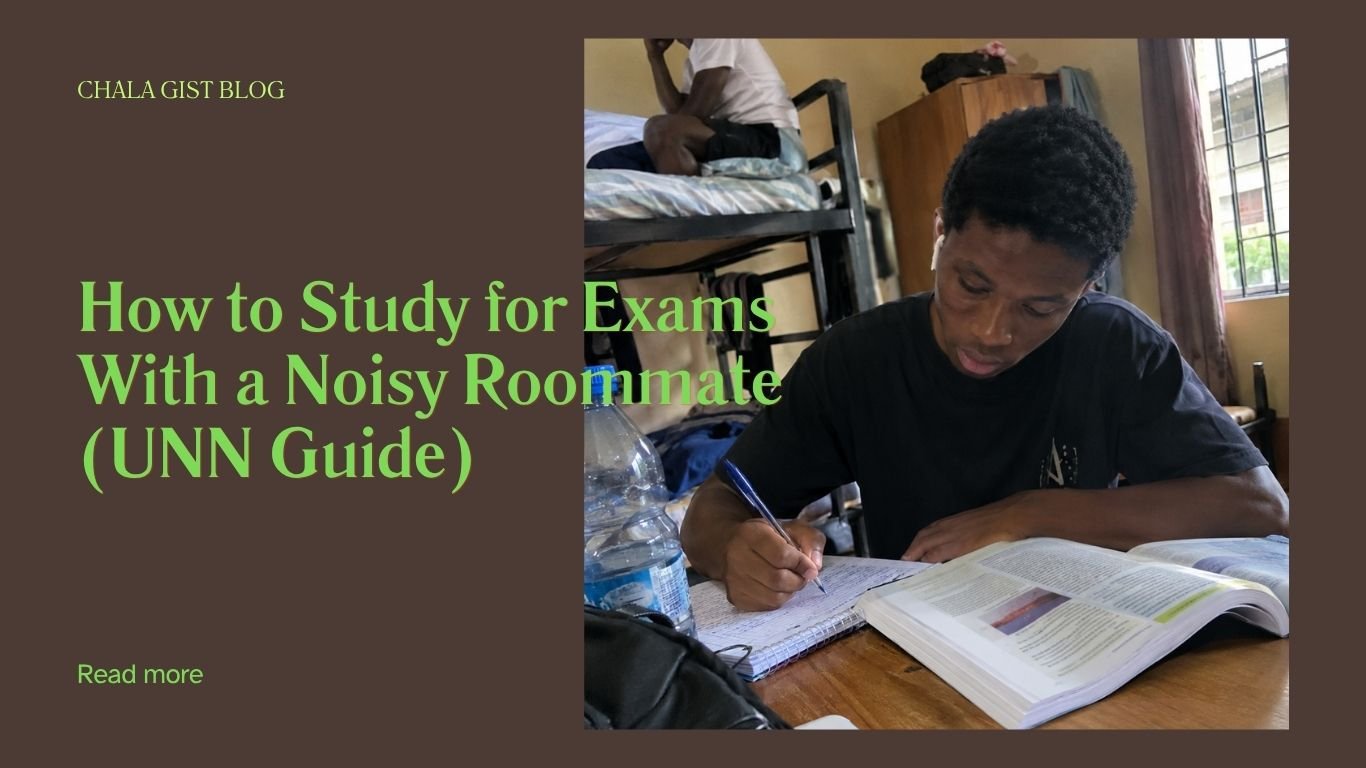
If you’ve ever tried to read Pharmacology at 9pm while your roommate is on a two-hour phone call, laughing like NEPA just brought light after three days, then you already know the kind of wahala I’m talking about. Exam period in a shared hostel room is a special kind of test — and I’m not talking about the one on your timetable.
I’m currently a 300-level Pharmacy student here at UNN, and I’ve spent enough semesters sharing a room to know that “noisy roommate” isn’t one single problem. It’s music at odd hours, it’s gist sessions that go on forever, it’s someone’s alarm going off seven times before they wake up, it’s a generator humming outside your window the same night you finally have light to study with. This post is everything I’ve actually tried, what worked, what wasted my time, and how I now prepare for exams without losing my mind or my roommate as a friend.
Why Hostel Noise Hits Different During Exams
Nigerian university student studying at a hostel desk with earbuds in while roommate talks in the background
Outside of exam period, noise is annoying but manageable. You can always “carry go” tomorrow. But once exams are close, your brain needs long, uninterrupted stretches to actually absorb information — not just read it. Pharmacology, Pharmaceutical Chemistry, Physiology — these courses don’t reward skimming. They reward the kind of deep, quiet focus that a six-in-a-room hostel space was never designed to give you.
The problem also isn’t only your roommate’s fault. Hostel rooms in Nigerian universities are built for sleeping and storage, not studying. Add thin walls, shared power sockets, generator noise from three doors down, and visitors who “just came to greet,” and you’ll understand why so many of us end up cramming in toilets, stairwells, and the back of lecture halls during exam week. If you haven’t sorted out your room setup yet, my Complete Guide to Setting Up Your Hostel Room and my post on soundproofing thin hostel walls are good places to start before exams meet you unprepared.
My Honest Corner Right Now
Let me be honest with you. Last semester, I had two roommates, and one of them loved his night calls. Not short calls — I’m talking calls that would start around 10pm and sometimes run past midnight, phone on loud speaker, laughing loud enough that I could hear the person on the other end too. It got so bad that during my Pharmacology CA week, I remember lying on my bed with my textbook open on my chest, stuck on the same paragraph for almost thirty minutes, because his laugh kept pulling my mind straight back into the room.
The night I still remember clearly was the Sunday before my Pharm Chem test. I had a full topic to cover, and by 11pm I had barely touched it. He was on a video call with his family back home, and every few minutes, someone on the other end would burst into laughter. I sat there vexed — not because he was doing anything wrong on purpose, but because exam period makes you sensitive to every small sound.
That night is actually what pushed me to sit him down the next morning and have the “quiet hours” conversation I talk about in Step 2. It wasn’t a fight. I simply told him straight, “Bro, this week is heavy for me, can we keep calls outside after 9pm?” He agreed almost immediately — he genuinely hadn’t realized how loud he’d been. That one conversation, plus a cheap pair of earbuds for the nights he forgot, changed my entire exam week. I won’t lie and say it’s perfect now, some nights still get loud, but I stopped treating it like a personal war and started treating it like a problem I could actually manage. Below is everything that has worked for me since then, and for coursemates I’ve compared notes with.
Step 1: Talk to Your Roommate Before Exams Reach
This sounds obvious, but most of us skip it. We’d rather manage the situation quietly and get vexed internally than have one honest conversation. The problem is, your roommate genuinely might not know their 11pm call or their music is disturbing you — especially if you’ve never said anything before.
The trick is to be specific, not general. “Please try to be quiet” doesn’t work because it doesn’t tell them what to actually change. Instead, try something like: “Bro, I have Pharm Chem CA this Thursday, can we keep things low after 9pm this week so I can read?” That’s a request with a reason and a deadline — much harder to ignore than a vague complaint, and it doesn’t sound like an attack.
Timing matters too. Have this conversation early in the semester or at least a week before exams start, not in the heat of a noisy night when you’re already annoyed. A calm ask lands very differently from an angry one, even if the words are almost the same.
Step 2: Set Unofficial “Quiet Hours” Between Yourselves
Most Nigerian university hostels don’t enforce official quiet hours the way some hostels abroad do, so if you want one, you and your roommate(s) have to create it yourselves. It doesn’t need to be a big house-rules conversation — it can be as simple as agreeing that from 9pm to 11pm, or 5am to 7am, phone calls happen outside and music goes on headphones.
If you have more than one roommate, a shared WhatsApp or room group chat actually helps here. Drop a message like “Exams start next week, can we try to keep 9-11pm calm for reading?” It gives everyone visibility and makes it a group agreement instead of you singling one person out, which reduces the chance of bad blood.
Step 3: Get the Right Gear (Even on a Student Budget)
You don’t need expensive gadgets to solve most of this. Here’s what actually makes a difference, from cheapest to most effective:
- Foam earplugs — the most underrated tool in this entire guide. They’re cheap, available at any pharmacy or supermarket, and block a surprising amount of low-level chatter and background noise. Perfect if your budget is tight this semester.
- Basic wired or budget wireless earbuds — even a simple pair paired with focus music or noise apps can mask a lot of disturbance. Budget wireless earbuds are widely available on Jumia in the lower price range, good enough for daily study use without breaking your semester allowance.
- Mid-range earbuds with some noise isolation — a step up if you can stretch your budget slightly, especially useful if your room is close to the generator house or a busy corridor.
- True ANC (Active Noise Cancelling) earbuds — these actively cancel out steady background noise like generator hum or fan noise, not just block it physically. They cost more, so treat this as a “if I can save toward it” option rather than a must-have. Prices for ANC earbuds change often, so it’s worth checking current listings on Jumia before you commit your money.
Whatever you choose, don’t wait until the week before exams to sort your gear out. Sound-blocking tools take a bit of getting used to, and you don’t want your first night with new earbuds to be the night before a CA. If you’re trying to figure out where this fits into your semester spending, my post on managing your semester allowance has more on budgeting for small but important purchases like this.
Step 4: Try Noise-Masking Sound (The Brown Noise Trend)
You’ve probably seen “brown noise” trending online — those long YouTube or Spotify tracks that sound like a deep rumble, almost like distant thunder or a steady waterfall. It’s become a big trend among students and even people with ADHD who use it for focus, and honestly, I understand the appeal in a hostel setting.
Brown noise doesn’t erase your roommate’s noise completely, but it “masks” sudden, sharp sounds — a laugh, a door bang, a phone ringtone — by giving your brain a steady, predictable background sound to lock onto instead. It’s worth being honest here: the scientific evidence that brown noise directly boosts focus is still limited, and some research hasn’t found a strong difference between brown noise and plain white noise. But plenty of students swear by the calming, masking effect, and it costs nothing to try. Search “brown noise study” on YouTube or Spotify, put in your earbuds, and see if it helps you personally — everyone’s brain reacts a little differently to it.
Step 5: Study “With” Someone — Even a Stranger Online
Here’s a trend that’s picked up serious momentum recently and honestly surprised me when I first tried it: “study with me” livestreams. This started years ago in South Korea as what’s called “gongbang” (study broadcast) and has since exploded globally, with students literally livestreaming themselves quietly studying for hours, while thousands of other students watch and study along with them — no talking, just the shared feeling of not being the only one grinding.
It sounds strange until you try it. There’s something about seeing another student’s desk, hearing pages turn, and knowing someone else is also fighting to focus that makes your own noisy hostel room feel a bit less like a battlefield. You can find hours-long “study with me” videos on YouTube, or join live study rooms on Discord where Nigerian students gather during exam season specifically for this. It won’t cancel your roommate’s noise, but it gives your brain a different, quieter “room” to mentally sit in.
Step 6: Change Location When the Noise Is Unbeatable
Some nights, no amount of earbuds or brown noise will save you — especially if there’s a full gist session happening two feet from your reading table. On those nights, the smartest move is to simply leave.
Your department’s reading room, the faculty library, an empty lecture hall, or even a quiet corner of the hostel common room during off-peak hours can save your exam prep on nights your room turns into a social event. Yes, it’s extra stress to pack up and relocate, but it’s far less stressful than staring at the same paragraph for forty minutes while a comedy skit plays in the background.
Step 7: Master the Quiet Window
In most hostel rooms, there’s a natural quiet window — usually very early morning before your roommate wakes up, or late at night after they’ve finally gone to sleep. These windows are gold during exam period.
If you’re naturally more alert in the morning, try sleeping earlier and waking by 4am or 5am to read while the hostel is still calm. If you’re more of a night owl, the hour or two after your roommate sleeps but before you get too tired yourself can be some of your most productive study time. The key is protecting that window on purpose — don’t let it slip away scrolling your phone, because it might be the quietest 90 minutes you get all day.
Step 8: Use Short Focus Blocks (Pomodoro) to Work Around Interruptions
When your environment is unpredictable, trying to force three straight hours of reading is setting yourself up to fail. Instead, break your study time into short, focused blocks — 25 minutes of reading, then a 5-minute break, repeated a few times. This is often called the Pomodoro technique, and it works especially well in a noisy hostel because even if you get interrupted, you’ve only “lost” a short block, not your whole evening. It also makes starting to read feel less overwhelming when you know a break is coming soon.
Dealing With NEPA, Generator Noise, and Roommate Noise Together
Let’s be honest — sometimes it’s not just your roommate. NEPA takes light, the whole floor’s generators come on at once, and now you’ve got engine hum layered under your roommate’s phone call. This combo is peak Nigerian hostel wahala, and it deserves its own approach.
On generator nights, earplugs alone might not be enough since the hum is constant and low. This is exactly where noise-masking sound (Step 4) earns its keep, because a steady brown noise or instrumental track can blend with a steady generator hum better than it can with sudden sharp noise. Pair that with earbuds that fit snugly, and consider positioning your reading table away from the window facing the generator house if your room layout allows it. My post on dealing with NEPA outages in your hostel room covers more on managing power situations generally.
When Nothing Works: How to Escalate Without Drama
If you’ve talked to your roommate calmly, tried gear, tried quiet hours, and the noise is still consistently wrecking your ability to prepare for exams, it’s fair to escalate — just do it the right way. Speak to your hall warden, porter, or student affairs office, calmly and with specifics (dates, what happened, what you’ve already tried). Most halls take repeated noise complaints seriously, especially during exam period, and room reassignment or a formal warning is sometimes the only thing that actually changes a habitually noisy roommate’s behavior. This should be a last resort, not your first move — but don’t be afraid to use it if your exams are genuinely at risk.
Frequently Asked Questions
How do I study with a noisy roommate without causing a fight? Talk to them early, calmly, and specifically — name the exact noise and the exact time you need quiet, instead of a vague complaint. Most roommate noise wahala comes from them not realizing it’s a problem, not from wickedness.
What is the cheapest way to block noise in a hostel room? Foam earplugs are the cheapest option and cost very little at any pharmacy or supermarket. Basic earbuds playing brown noise or instrumental music are the next affordable step before you consider ANC earbuds.
Does brown noise actually help you study? It mainly works by masking sudden sharp sounds like laughter or a slammed door, which is why it feels calming. The evidence that it directly boosts focus is still limited, but many students genuinely find the masking effect useful in a noisy hostel.
What can I do if my roommate refuses to keep quiet during exams? If a calm conversation doesn’t work, change your study location during their peak noise hours, protect a quiet window early morning or late night, and if it becomes a repeated pattern affecting your grades, report it to your hall warden or porter.
Final Thoughts
A noisy roommate doesn’t have to mean a ruined exam season. Most of what works isn’t expensive — it’s a mix of honest conversation, a bit of gear, knowing when to leave the room, and protecting the quiet windows you do get. I won’t lie and say every night will be silent, because hostel life in UNN will always come with its own wahala. But with a system in place, that wahala stops controlling your reading time.
If your room setup itself is part of the problem, start with my Complete Guide to Setting Up Your Hostel Room — it covers everything from a proper reading table to organizing your space for fewer distractions in the first place.
MORE TO CHECK OUT:
- How to Organize a Nigerian Hostel Room on a Small Budget
- DIY Reading Table for Under ₦10k: How I Built Mine in a Weekend
- How I Fixed My Leaking Tap in My Hostel Room Without Calling a Plumber
- How to Decorate a Small Hostel or Lodge Room Without Spending Much As a Student
- How to Make Your Room Smell Good and Stay Clean With Limited Space
- How to Deal With NEPA (Power) Outages as a Student
-
DIY Mosquito-Proofing Your Room: How I Stopped Fighting Mosquitoes Every Night in My Hostel
-
How to Soundproof a Thin Hostel Wall Cheaply (Without Wahala or Wasting Money)
-
How to Budget Your Semester Allowance as a Nigerian Student (To Avoid Borrowing From Loan Apps)
-
10 Cheap Foodstuff Combos That Actually Fill You Up on Campus (2026 Guide)
-
How to Cook Without a Kitchen: Hostel-Friendly Meals With One Burner


How to Stay Safe Walking Around Campus at Night

Dealing With Landlords: A Student’s Off-Campus Guide

How to Do Laundry Without a Washing Machine (Fast Guide)

DIY Reading Table for Under ₦10k: How I Built Mine in a Weekend

How to Deal With NEPA (Power) Outages as a Student
DIY Water Storage Solutions for Hostels With No Water
-
 Hostel & Self-Contain DIY4 days ago
How to Do Laundry Without a Washing Machine (Fast Guide)
-
Hostel & Self-Contain DIY4 days ago
DIY Group Study Setup for a Small Common Room or Balcony
-
 Student Side Hustles & Income4 days ago
How to Stay Motivated During ASUU Strike: 9 Practical Steps
-
 Campus Survival Guide17 hours ago
Dealing With Landlords: A Student’s Off-Campus Guide
-
 Study & Productivity2 weeks ago
Best Free Apps Nigerian Students Actually Use for Note-Taking and Planning in 2026
-
Hostel & Self-Contain DIY2 weeks ago
How to Study for Exams With a Noisy Roommate (UNN Guide)
-
 Study & Productivity2 weeks ago
How to Set Up a Distraction-Free Study Corner in a Shared Room
-
 Campus Survival Guide16 hours ago
How to Stay Safe Walking Around Campus at Night
Pingback: How to Organize a Nigerian Hostel Room on a Small Budget - Chala Gist Blog